Tuesday, December 4, 2012

Washi tape Christmas tree card

Having originally said no to handmade Christmas cards this year due to lack of time, I decided in the end that I'd like to make just a few. :)

I was browsing Two Peas in a Bucket and came across this card, and just loved the stylized washi tape Christmas card. I used that as "lift inspiration" for my design, although instead of a curly bracket tag and ledger paper underneath, I decided to stamp directly onto the card. I used Tim Holtz's Antique Linen Distress Ink. Stamping definitely isn't my strong suit, but I wasn't too worried if it wasn't perfect.


For the tree, I adhered strips of washi tape (from Downtown Tape - love their site!) to cardstock then cut it into strips of different widths and lengths. I had some snowflake brads in my stash which I thought would work on the tops of the trees.

When making multiples of one card, I like to line up a "mass production" line, even just for 10 cards like in this case.


With all the elements lined up and ready to go, it didn't take long to have all the cards finished!


Such a good feeling to have this completed within the first week of December!

~ Caroline ~

Friday, November 23, 2012

Prep for December Daily

It's the day after Thanksgiving, and I'm in a creative and festive mood! In spite of a much-increased workload this year, I've decided nonetheless that I want to do another December Daily album. Last year was the first time I'd attempted this project, and I loved it.
(Click on these links to read more about my intro, prep, part 1 and part 2 from my project last year.)

I know that preparation is my friend, and the key to helping me complete the project this year. I had a number of different ideas about what approach to take. Last year I used Ali Edwards' templates as inspiration for a 8.5 x 5.5" book that I made with my Bind-It-All. I did some prep work but still found there was quite a lot to do each day - for a slow scrapper like me, anyway!

This year I've picked a Bo Bunny album with 6 x 6" chipboard pages. I haven't yet decided what to do with the cover, but I might paint it. I really like what Ali has done on the spine of her cover this year. Might have to lift a similar idea. :)
 

I decided to dip into my stash to create a sort-of Smash-style album with patterned paper from a variety of sources - My Mind's Eye, Making Memories, Basic Grey, Kaisercraft and probably some others I've long forgotten. :) I broadly stuck with red, green and blue (I really like blue in the mix) plus some pretty vintage paper I love. I cut a selection of the papers to 6x6 and laid them out on the floor.

I wanted to pick some embellishments and other pretties to go with the papers, too. Here's what I picked out.


To try and cut out the day to day guesswork, I matched some of the embellishments to the papers in what looked like a cool patchwork on the floor:
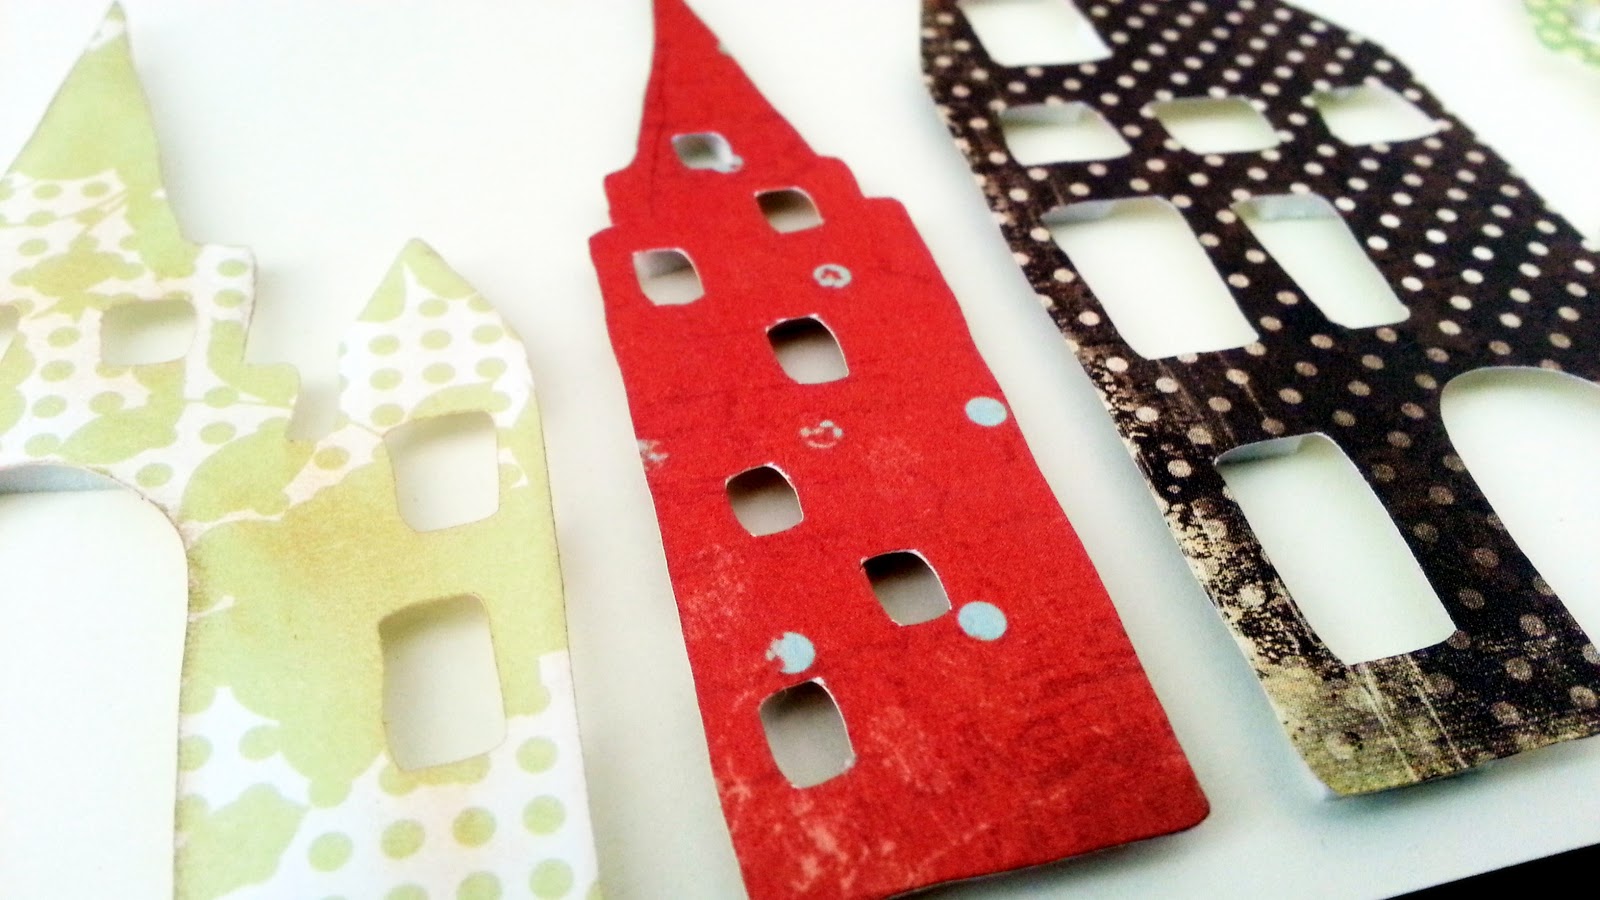


And some close-ups:


I'll also be using some washi tape. Right now I like the idea of using washi tape to adhere the photos, but we'll see how it goes.


It's unusual for me to do this much upfront prep work and have the pages so ready ahead of time. I'm thinking that black and white photos will look pretty cool in here, and will help me stop stressing about whether or not the photos will match the papers. :)

I still haven't decided if I'll stick the embellishments down before December or if I'll just use these pictures as a guide for when the time comes. I also don't know yet about how I'll number each day - whether to pick out a cool alpha, or mix it up.

But I am on my way with DD'12 - proud of myself for getting this far so early, and not buying a single new thing as everything has come from my stash - yay!

~Caroline~

Thursday, October 25, 2012

Smash-style book for newlyweds

Some friends of ours got married last weekend. Yay! I made a Smash-style book (see here for the uninitiated) as a gift for them, either looking back at what brought them together, or now as they start their married life.

First step: pick out pretty papers that will work together. I used two or three different paper pads/collections and mixed them together. I wanted to stay away from overtly girlie patterns and colours, and tried to stick with more geometric or neutral designs. Here are some of the papers I chose:


These were all 12x12" papers, which I cut into 6x6". Then I laid them all out and matched up the ones I thought worked well together. I put them into some sort of order (I didn't want a pattern repeated on a following page) then glued them together back to back. If you used double-sided papers then this wouldn't be necessary. :)

For the cover, I added an extra layer of cardstock between the two pieces of paper, to give it more stability.

Then I used my Bind-It-All to punch holes in each of the papers, and some white O-wire to bind it. I didn't want the binding to go all the way down, so I just did one central punch for each sheet.

I put my friends' names on the front, the date of their wedding, and decorated it simply with a line of adhesive pearls. I wanted it to be nice and simple. I used white Thickers-style letters for the names and the date.


On the inside, I added some letter stickers saying "A book about us", and on the facing page, I added a small sheet which I also punched with my Bind-It-All, cutting between the holes so they could remove the sheet. It was a small personal note with some ideas on what to put in the book - notes about each other, Instagram photos, that type of thing.


It was great fun putting this together; I think I'll be making some more books like this and may even do a December Daily along these lines, also!

~ Caroline ~

Sunday, September 30, 2012

Right now

A few days ago, Ali Edwards invited any readers of her 52 Creative Lifts newsletter to do something with a journaling prompt about "right now". Here's my digital take, made at 6"x4" so it'll easily fit into my Project Life album. This is what I was doing/thinking on Thursday:


I have an entry in one of my Evernote notebooks with some of these blank journaling prompts, and once in a while I'll fill them out. It's interesting to look back at them over time!

~ Caroline ~

Sunday, September 23, 2012

Cityscape with Hit the Road design card

I have loved the Hit the Road design card ever since I got my hands on it. I particularly like the look of all the whimsical buildings with their cutout windows.


For this cityscape, I grabbed a few scraps, all with polka dots, and cut out a variety of the buildings (only one shape is repeated, using the mirror function - can you spot it?) I used 4" cuts each time.

On the lighter coloured pieces I added a little bit of brown blending chalk just to tone down the brightness and add some definition to the edges. A pale ink such as Tim Holtz's Antique Linen Distress Ink would also work well for this.


Then I used some thick pop dots to adhere all the buildings to a piece of card. I may back it further or put it in a shadow box on the wall.

This would be an easy project to repeat on a smaller scale (maybe with 2" cuts) for a card to congratulate somebody on moving house, or as a change of address card.

~ Caroline ~

Thursday, September 6, 2012

Saying Thank You

There's been a lot going on lately which has meant my poor blog has been neglected. Several hospital stays for the hubby, and lots of stress at work. Last week my coworkers were especially wonderful in the midst of it all and we pulled together in some amazing displays of teamwork. I made some banana bread as a thank-you to them:


I've also become a Silhouette Cameo owner, so my Slice has become the jealous party in my scrap room! However, it's definitely not been forgotten, so expect some more Slice-related posts soon.

~ Caroline ~

Saturday, July 7, 2012

Graduation cards with the Slice

I meant to post this before, but better late than never! :) Here are a couple of graduation cards I made recently. I wanted a very simple design and the Slice made it easy! I used the Greetings design card to cut out the black cap.

Here's the one for a guy:


And here's the one for a girl, with pink and bling. :)


~ Caroline ~

Saturday, June 23, 2012

75th birthday card

My Dad turned 75 this week and I made him this card.


The background paper is from an old  DCWV paper stack. I cut the 75 from kraft cardstock using my Slice and the Basics 3 design card, then sprayed them with Perfect Pearls mists.


I had a lot of fun designing the inside. I'd seen a similar idea for the inside on Pinterest and thought I'd give it a try!


I cut the banners from the Dilly Dally design card. The "happy" and "birthday" both came from the Words and Expressions card. I just cut up the "happy" and adhered the letters to the banner. I attached the hemp cord with polka dot washi tape. I know cards for guys typically don't need bling, but I did add just a tiny dot of bling for the "i" of birthday.

I heard that the card safely made it to England intact, and in time for the special day! :)

~ Caroline ~

Friday, June 15, 2012

Craft room wall of pretties

In our new house I am delighted to have a craft room which combines with our home office! It's wonderful to have desk space for projects that are in progress, and not to have to put everything away each time I want to scrap. This fits much better with my working full time, as I can walk by and pick just a small thing to do, and "drip feed" scrap which is sometimes all I have time for.


I was initially thinking of painting this wall, but then I had this quicker, easier idea which I can change if I want. This is my solution for using pretty papers (an absolute weakness of mine) which I might not want to cut up, but which nonetheless I want to have on display! Like the wall art in my last post, I can change the papers to something else whenever I want. I used mini wooden pegs to clip them to the baker's twine which I hung up there. I might also use this to display projects, although I'm making less 12x12 layouts these days, except for Project Life, and preferring smaller projects and mini books. Plenty of options for my wall of pretties. :)

~ Caroline ~

Wednesday, May 30, 2012

Using repetition with the Slice to make art

I've had this framed corkboard for a while but haven't ever put it to good use. My husband recently hung it on the wall of the kitchen in our new house, and I was inspired to make the most of its new location. The shaped pins came with the corkboard.

I cut 11 jugs from the Faith design card at 2.5" using a variety of patterned papers. It was a lot of fun meandering through my stash and finding papers that worked together! Then I hung the handle of each one on a small pin, with the larger pins mixed in with them. It'll be easy to change out the design when I want something different up there - I'm planning on changing this with the seasons, using it for birthdays etc.


~ Caroline ~

Saturday, May 19, 2012

Week in the Life 2012

For the first time ever, I decided to embark on Ali Edwards' Week in the Life project. It coincided with a 2-day conference for work and a bunch of other busyness that I initially justified as ruling me out of WitL. But after telling a friend about the project and seeing her excitement, I decided to go for it anyway!

I knew I'd need to keep it simple if I was going to succeed. I printed out the daily sheets from Ali's website and kept them with me throughout each day. I took ALL the photos with my phone (Droid X - love it!) then at the end of the week made a 2-page montage in Photoshop Elements for each day. I took about 150 photos during the course of the week.

When I put it all together, I repurposed an 8.5x11" spiral-bound folder that was lying around, tore out a few excess pages, then stuck the daily sheets right on top of the original content. Then I used Smash tape to add the photos as an addition on the side for each day. Really simple meant that I actually accomplished this project, and I am so pleased I did!

Here's the front cover:

The "day by day" cardstock punch-out was from a 12x12 punch-out pad from Colorbok that I won at a crop. The rest of the lettering, ribbon and metal flower are from Making Memories (mostly Paperie collection).

Here are a couple of examples of what each day looks like (they're all quite similar):


Even though technically you could do this project anytime, it felt good to go through the week knowing there were other WitL-ers out there all doing the same thing! I think I already take quite a lot of everyday-type photos, but being more intentional about it made me even more aware of my surroundings and gave me a fresh look at things I don't always notice.

I'll definitely try and do this again next time around - I think Ali is planning for that towards the end of 2013 which seems like a long way off right now but will likely be upon us soon. :)

~ Caroline ~

Sunday, May 13, 2012

Project Life: shopping my stash

The arrival of National Scrapbooking Day last weekend provided the impetus I needed to get the scrapbooking-related boxes unpacked from our house move and forge some semblance of a creative space in which to work! It's lovely to have a more dedicated space now, so I can leave projects out and work on them for just a few minutes at a time. This has really helped me in my quest to do more work on my Project Life album.

I started scrapping in 2008 and it's amazing how much stuff I have accumulated during that time. I'm more determined now than ever to use what I have in my stash - and I'm finding Project Life is breathing new life into products that I've otherwise been slow in using or not sure how to incorporate into my projects. I'm not banning myself from buying new things, but I am at least trying to "tame the beast" of my growing stash! Some ideas below:

Mixing old and new supplies is definitely one of the ways I'm using things that have somewhat fallen out of favour (I learned this from Noell on Paperclipping and also Glitter Girl on Two Peas) - top left you can see old stickers and new washi tape. On the journaling card beneath is a camera I cut with my Slice. I'm finding that I'm cutting a lot more shapes of actual objects when I have my "Project Life hat" on - and not just swirls and abstract designs. Below right, you can see some patterned paper I've had for a while that I really like (with a big compass on it) but wasn't sure how to use it. I'm finding cutting up large-patterned papers to fit in the pockets is a great way to showcase the ones I find hard to use on a "regular" scrapbook page.


The first photo below doesn't show up too well below (candlelit baths aren't too easy to photograph...) Beneath that I cut out the word "relax" three times from some older patterned paper that matches the watery theme of the photo. I really like the tone-on-tone look. On the adjacent journaling card is a tea cup (Grandma's Attic card again) cut from older patterned paper (tone-on-tone again) and coloured a little with chalk, plus a stamp from my Smash date stamp. In the other photo is another favourite of mine - printing words directly on my photos.


Thickers directly on a photo. Simple and I love it! Above that you can just make out some patterned paper with a button sewn on the top for some textural variety.


I bought these journaling cards from Making Memories (Noteworth line) with the specific intention of using them for PL. I love the fact that they are shaped. I mixed them with the older bow glitter embellishment, cut out the letters from my trusty Slice (Grandma's Attic card) and added some bling. Below that, I cut out "good eats" from the Bon Appetit card and just put it on the back of the journaling card from the previous page. In the next journaling spot is some old patterned paper that I still liked but wasn't sure how to use till now.


I cut "April" from one of the fonts on the Handwritten fonts design card. The green part of the flower is also cut using my Slice, layered with a small paper flower (with some texture) and a purple brad in the middle. I've had the border for a while, and finally found a home for it as the colours went well with everything else on the page. On the journaling card below that I made a word cloud for Easter using the Faith design card.


That's all for now, folks - have fun shopping your stash and finding new ways to use what you already have!

~Caroline~

Tuesday, February 28, 2012

The Slice and Project Life: journaling cards inspiration

I have been following other people's Project Life projects for a while now. Sometime toward the end of last year, I decided to jump on the PL wagon, but use it in a slightly different way. I have only been scrapping for a few years and yet I've been into photography for much longer. A light bulb went on when I first started to "get" Project Life because I realised it answered a lot of the questions I had about "how the heck will I ever get 'caught up'?!" Now, I know that "being caught up" is a bit of a myth and is also not necessarily something to aspire to. However, for a long while I've been wanting to document SOMEthing from my existence prior to becoming a scrapbooker, but hadn't been able to figure out how.

The way I've now started to use PL is simply to provide an overview - typically a double spread per month (or so) rather than per week. I'm adding in extra pages where I need to, for important events. Thankfully, my hoarding tendencies mean I have kept some memorabilia and ephemera "just in case" and can justify my actions now that I have the perfect place to put it! :)

I've discovered that the Slice is absolutely fantastic for using with Project Life. The designs are just the right size, and below I'm sharing some of the ways in which I've dressed up the basic journaling cards in different ways. I've used a bunch of different design cards here; if you have questions about a specific one, please feel free to ask! Not all the journaling cards use the Slice, but it definitely features heavily here.

These are some of my ideas, tips and inspiration on how to make journaling cards your own.

Repeating a theme (in this case, circles)


Add texture and dimension (this was made by embossing Core'dinations cardstock with the Cuttlebug)


Create a colour-coordinated cardset - even with different fonts, these look like they belong together.


Add a fun shape or embellishment - this would work great with a travel theme, for example.


Use a repeated shape in different ways - even though the colours, position and orientation changes, using the same shape brings some continuity.


Numbers - who can go wrong with numbers? A very popular theme right now - great for embellishing and creating lists (which can help break through that "writer's block")


Create a whole matching set - easy peasy! Just pick some patterned paper that goes well with the photos for that spread.


~ Caroline ~

P.S. Yes, I've decided to stick to British spellings on here now; seeing as I'm English it seemed the right thing to do. :)

Monday, January 16, 2012

Off the page - Make a fuzzy name plate

The other day I decided that the time had come (long overdue, I might add) to tidy my scrapping area. Of course, my plans lasted all of about 10 minutes because I suddenly became super creative and just HAD to make something! So, this was made during my attempt to tidy.


It's a name plate for a dear friend who gave birth to a beautiful baby girl just before Christmas. The nursery is decorated in green and purple so I knew that's what I wanted for the background. Yes, the pipe cleaners were going to be straight. But I've decided to enjoy the uniqueness of the slightly wonky ones on the bottom left...:)

The bottom layer is chipboard. I used hot glue to adhere the pipe cleaners, alternating the green and purple. I laid out all the pipe cleaners and used a line of glue across all of them at several points along their lengths. This needed to be done in stages because the glue dries pretty quickly.

I used the Handwritten Fonts design card to cut out letters to spell out Ella Jo's name. I haven't had this design card very long, but I've already put it to good use on a variety of projects.The flower was cut from the Greetings design card.


I cut the letters and flower out of regular white cardstock, then sprayed them with Ranger Perfect Pearls mist which I just love! It adds a great shimmer to the shapes (although I found it tricky to capture it in a photo).

Adhering the the letters to the pipe cleaners was a bit tricky, but in the end I found Glossy Accents worked best.


I'll definitely be using these ideas and techniques on future projects!

~ Caroline ~

Monday, January 2, 2012

December Daily - second half

Here are the remaining posts for my DD album. For the first half, click here. I'm still feeling vindicated at getting this album finished! :)


~ Caroline ~